Not finished, copy of gallery article ...
...
Change Ordering
(1) Click on up and down of the order controls or change the value there.
This will automatically update all other ordering controls but not save to the database
(2) Use the grren "OK" button to write the changes to the database
See following image

The sorting depends on parents and child galleries. Child galleries will be ordered direct behind their parent. This applies also to sub - childs when theparent is a child itself. Then a cascade of childs and sub childs will follow the first parent.
(3) While changing the "first gallery" from 5 down to 2 the child gallery "a subgallery" will always follow having a ordering with 1 higher. Result see below

Sadly this has a side effect. If you try to increase the parent gallery ordering it will not go up through clicking. You may set te value by key which works when leaving the control.
Images Edit View

(1) Title
Is derived from the file name when uploading. May have been changed when it was edited in image property view.
(2) Filename
File name of uploaded file on server. May be different from the image name on the PC due to character restrictions in URL or server operating system
(3) Gallery
Tell or changes the parent gallery
(4) Description
Text which is displayed in the gallery view if enabled in the configuration
(5) Status
Publish or hide the image
(6) Ordering
Change appearance order
(7) Owner
Tells user who uploaded the image
(8) Item Preview
Shows a medium sized view of the image
(9) Display parameters
Add parameters used in display of the image to overwrite settings from the configuration for this image.
Use the form of Name='value', one assignment per line. Sadly the name of the item has to be derived from the config control name.
(10) Links to image
Tells the path of the image as URL link
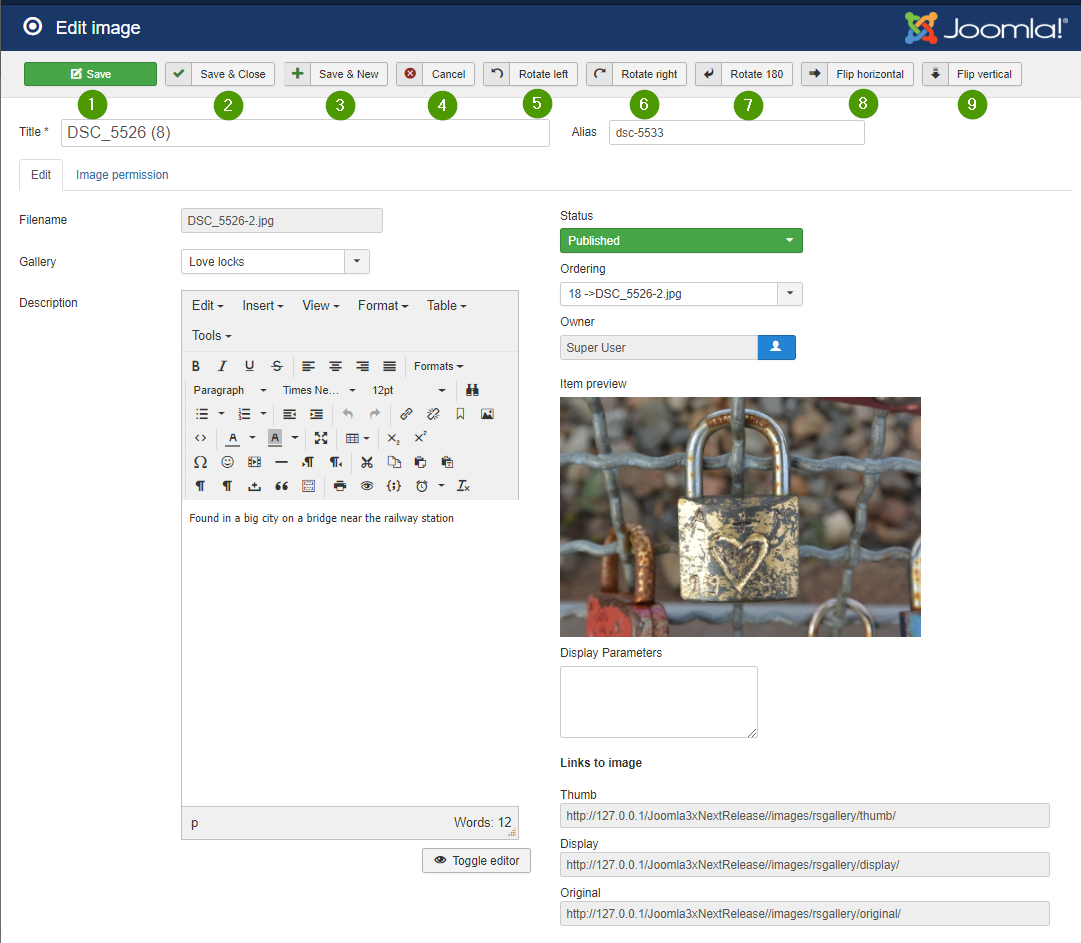
(1) Save
Saves the changes
(2) Save and close
Saves the changes and exits the edit view
(3) Save and new
Saves the changes and opens an empty edit view
(4) Cancel
Exits the edit view
(5) Rotate left
(6) Rotates right
(7) Rotate 180
(8) Flip horizontal
(9) Flip vertical
Images list view
Image list columns

(1) Number in list
%
(2) Select image
The topmost rectangle selects all images which is useful for batch processing The selector beside the image information selects this image
(3) Status
A green 'OK' tell that the image is published. (Otherwise red)
(4) Image title
Title displayed to user in views if enabled.
The title of the image may be different to the image file name. It will be preset with image name on upload and changes with the property edit or on single image edit.
(5) Image name
Real file name used on the server
(6) Parent gallery name
Each image is assigned to a gallery
(7) Image order
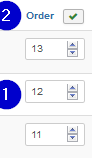
(1) Order number
The order number of the image may be increased or decreased or set manually.
(2) Save Order
On click the order numbers are saved. Any mismatch like double entries will be aligned
Example:
Exchange numbers: Previous: A:12 B:11 C:13. Write destination numbers and click save into the three controls. Result: A:11 B12: C:13
(8) Date and time
The date and time will be assigned on upload with the upload time
(9) Votes
The value will be between 0..5. It is calculated by Rating / Votes
(11) Rating
Total of all votes
(12) Hits
Count of views / appearances
(13) ID
Internal ID of image for reference or matching in other list
(14a) !!! Hover on image title
Hovering over the image title will show the thumb of the image as tool tip
(14b) !!! Click on image title
A click on the image title will lead to the edit view of the image
Image(s) task buttons
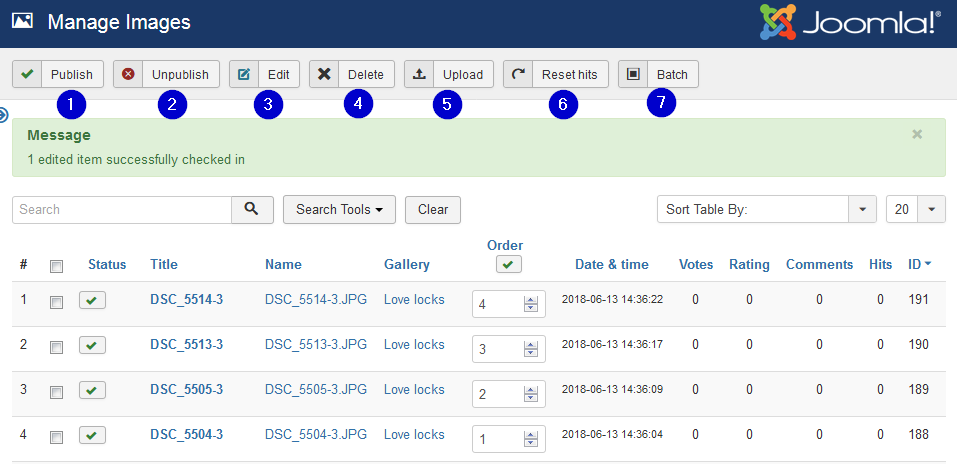
(1) Publish
Assign published to the selected images
(2) Unpublish
Assign unpublished to the selected images
(3) Edit
Leads to edit view of one selected image
(4) Delete
Will delete all selected items. On yes of the follow up question the image is deleted. Attention it is deleted immediately and not saved in the trash
(5) Upload
Go to the upload, Go directly there. Do not go over the control panel ;-)
(6) Reset Hits
Resets the hits of the selected Images
(7) Batch
Add the selected images to the task list and start the batch form
Possible batch tasks:
- Move image(s) to gallery
- Copy image(s) to gallery
- Add (change) properties to image(s)
See below
Image(s) search options
The search options follow the standard search behavior of Joomla!
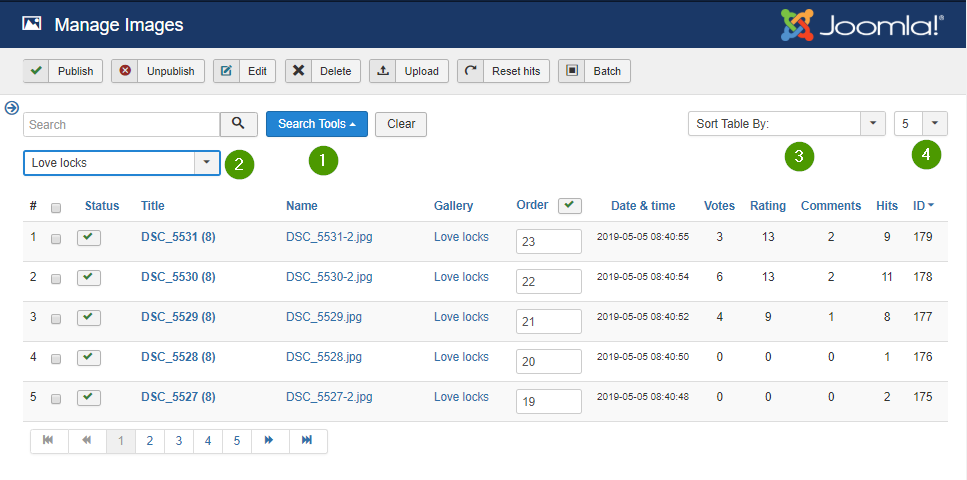
(1) Activate search controls
(2) Select gallery
Only image of the selected gallery will be shown
(3) Columns sorting
Defines the column the list will be sorted by and also the direction
(4) Limit per page
It defines the count of image which will be shown on one page
Images: Batch process to add properties
In the images list view images can be selected for batch processing. The following image shows the possible selections which appear after clicking the batch button
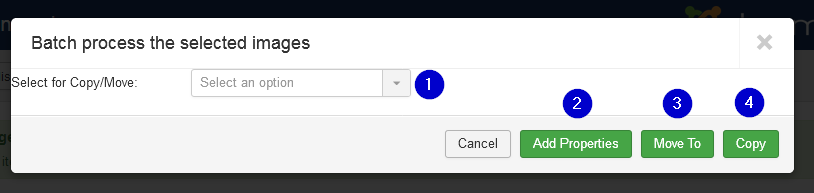
(1) Select Gallery
Select a gallery as destination for copy or move of selected images
(2) Add properties
This button leads to the properties form (See below) and will open the selected images. The title and description can be changed for a batch of images. also image can be flipped and rotated there.
(3) Move to
Batch processing: The selected images can be moved to the selected gallery
(4) Copy to
Batch processing: The selected images can be copied to the selected gallery
Properties uploaded Files
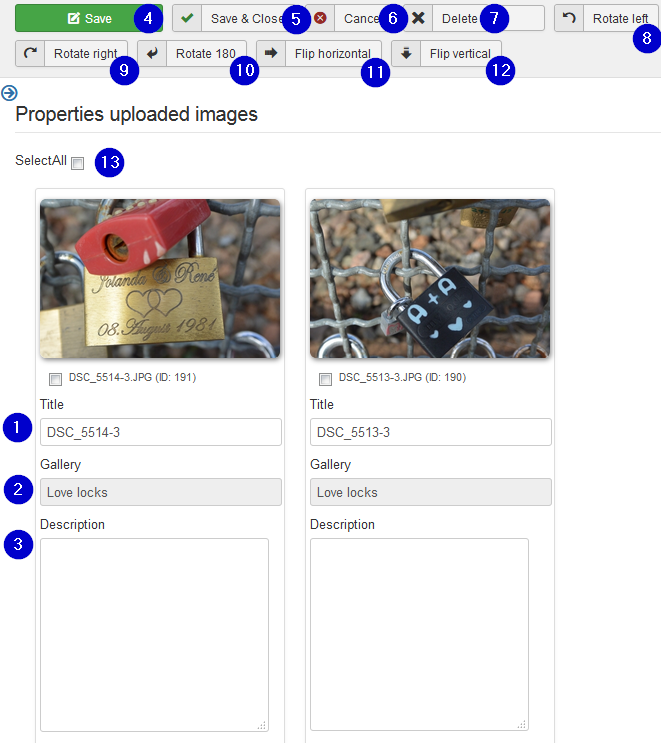
This form enables to set the properties title and description for a batch of images at the same time. It is normally reached over the upload form. It can also be reached with selected images over the batch button in the images list form
(1) Title
The title is preset on creation. It may be edited here. The title may be different to the uploaded image name when the name already existed. Then the next free number is appended.
(2) Gallery
The gallery name can't be changed in this part
(3) Description
The description may be changed with the standard editor like in the edit single image form. Sadly this leads to a very high edit block which creates a ugly layout.
(4) Save
Save changes and continue edit on the same images
(5) Save & Close
Save changes and leave the form to the image list
(6) Cancel
Ignore the changes and leave the form
(7) Delete
All or some image can be selected for deleting. (See (8) and (9)) Clicking on the delete button will delete the selected images from the RSGallery2 database and the created image files
(8) Rotate left
Rotates selected images 90 degrees against the clock
(9) Rotate right
Rotates selected images 90 degrees with the clock
(10) Rotate 180
Rotates selected images 180 degrees.
(11) Flip horizontal
Flips the selected images horizontal. The bits move from left to right. The bottom of the image keeps being the bottom
(12) Flip vertical
Flips the selected images vertical. The bits move from bottom to top. The left/right side of the image keeps being the left/right side
(13) Select all
All images will get a set hook in the box below the image (See also (14)) This can be used to delete, rotate or flip selected images.
(14) Select image
The image will get a set hook in the box below the image This can be used to delete, rotate or flip selected images.